Install Let's Encrypt SSL
To install Let's Encrypt SSL:
- Log into the desired user account.
- Navigate to
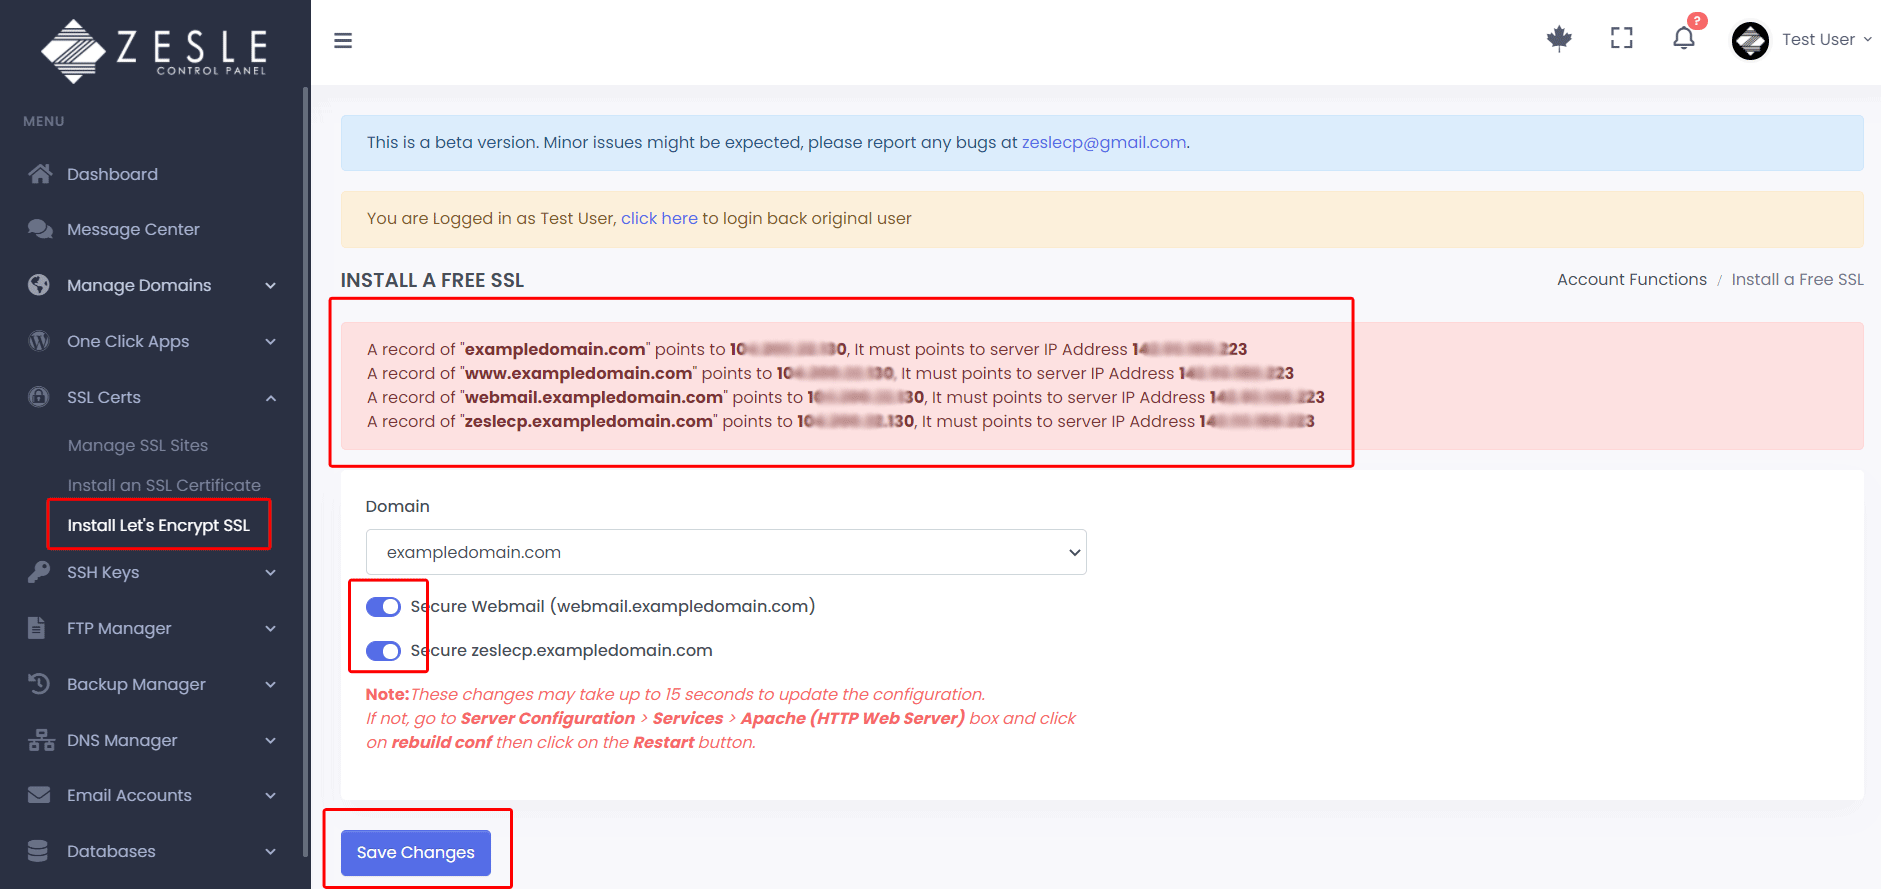
SSL Certs>Install a Let's Encrypt SSL. - Select the domain you want to apply the certificate to. For this guide we use the domain exampledomain.com
- If it's the main domain (not a subdomain), select if you also want to install SSL to "webmail" and "zeslecp" subdomains.
- Click on the "Save Changes" to finish installing Let's Encrypt SSL.
- It will show the message "SSL installed and will be ready in 30 seconds. Please check under
SSL Certs>Manage SSL Sites"
Note:
If your installed SSL does not appear on the list page (
If your installed SSL does not appear on the list page (
SSL Certs > Manage SSL Sites), just
wait for 10-30 seconds and refresh the page.
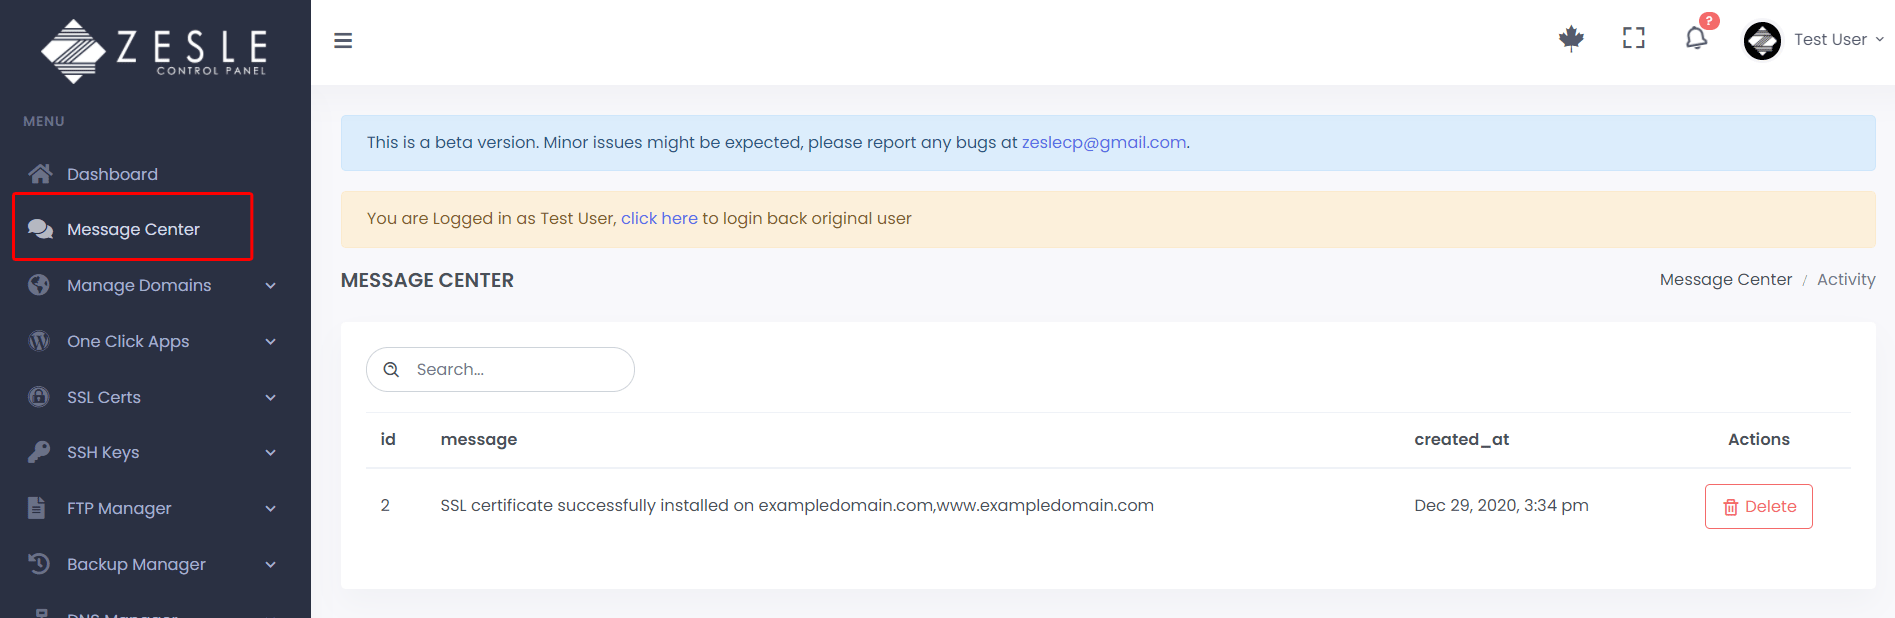
Message Center:
Check the message center to see if there are any errors related to your SSL installation (see screenshots below).
Check the message center to see if there are any errors related to your SSL installation (see screenshots below).
Link Domain:
Check our article on how to link your domain or subdomain with your server here.
Check our article on how to link your domain or subdomain with your server here.
Error Cases:
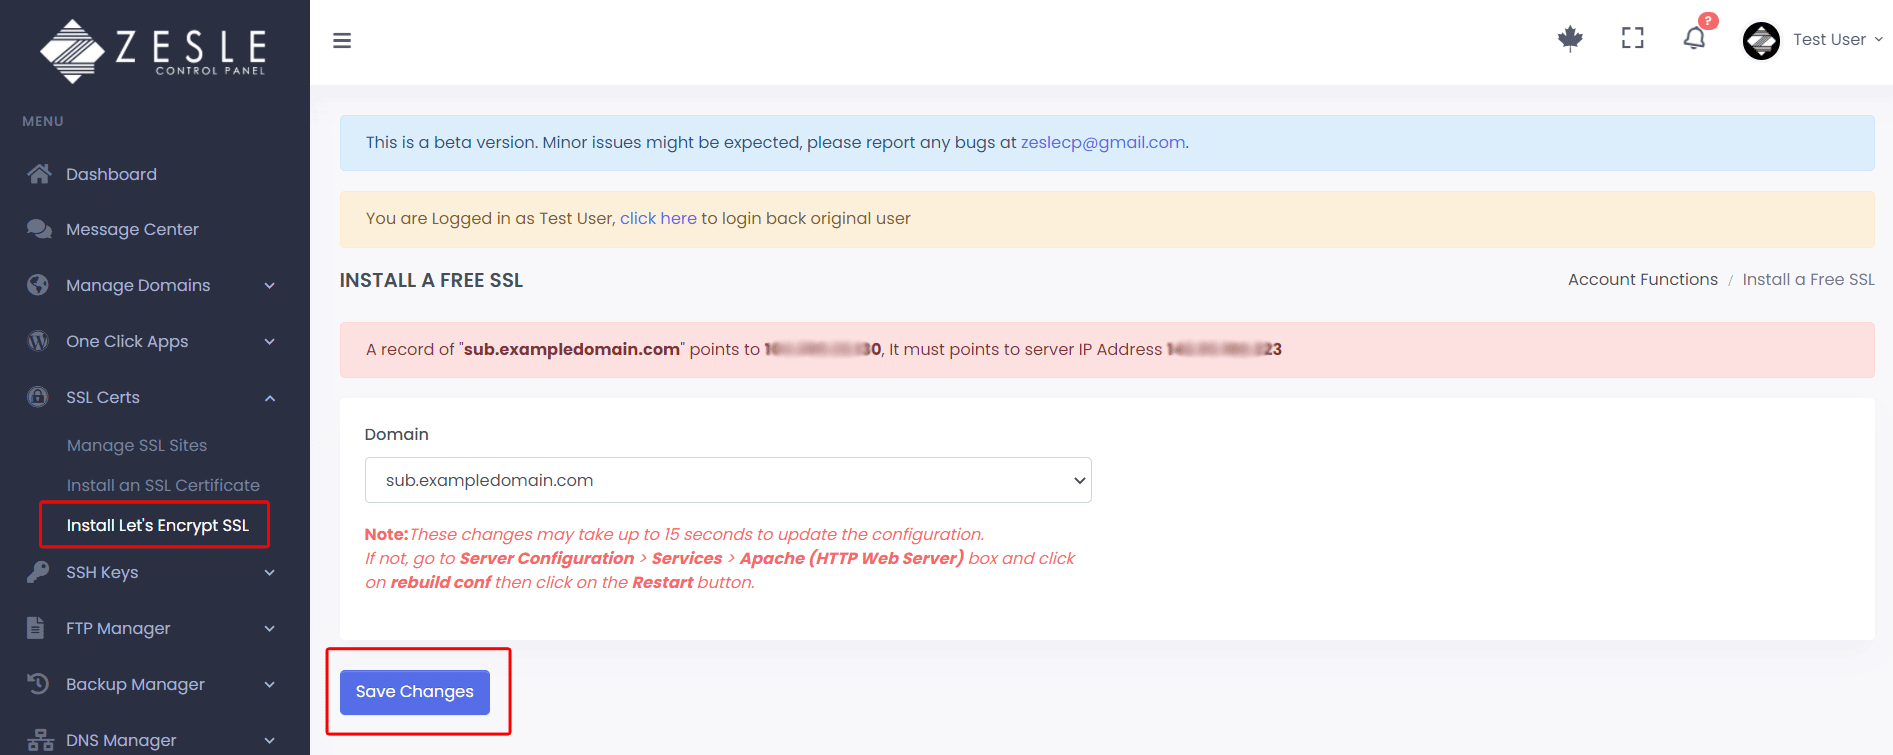
Subdomain not linked to this server
- If you get the following error message as shown in the screenshot below, this means your subdomain is NOT linked with your server.
- Go to your domain registrar and add "A Record" IP for this subdomain. A record IP change may take anywhere from 20 minutes to a few hours.
- Once A record IP is updated, try SSL installation again.
Main domain (or subdomains) not linked to this server
- If you get the following any or all of these error messages as shown in the screenshot below, this means these domain/subdomains are NOT linked with your server.
- Go to your domain registrar and add "A Record" IP for your domain and for "www", "webmail", and "zeslecp" subdomains. A record IP change may take anywhere from 20 minutes to a few hours.
- Once A record IP is updated, try SSL installation again.
Message Center