To configure custom nameservers (in your domain registrar account):
Log into your domain's registrar account to configure nameservers and custom
hostnames (also called glue records) for the above entered ZesleCP values.
For example, if your primary domain's registrar is Namecheap.com. Login into your Namecheap account and follow these steps:
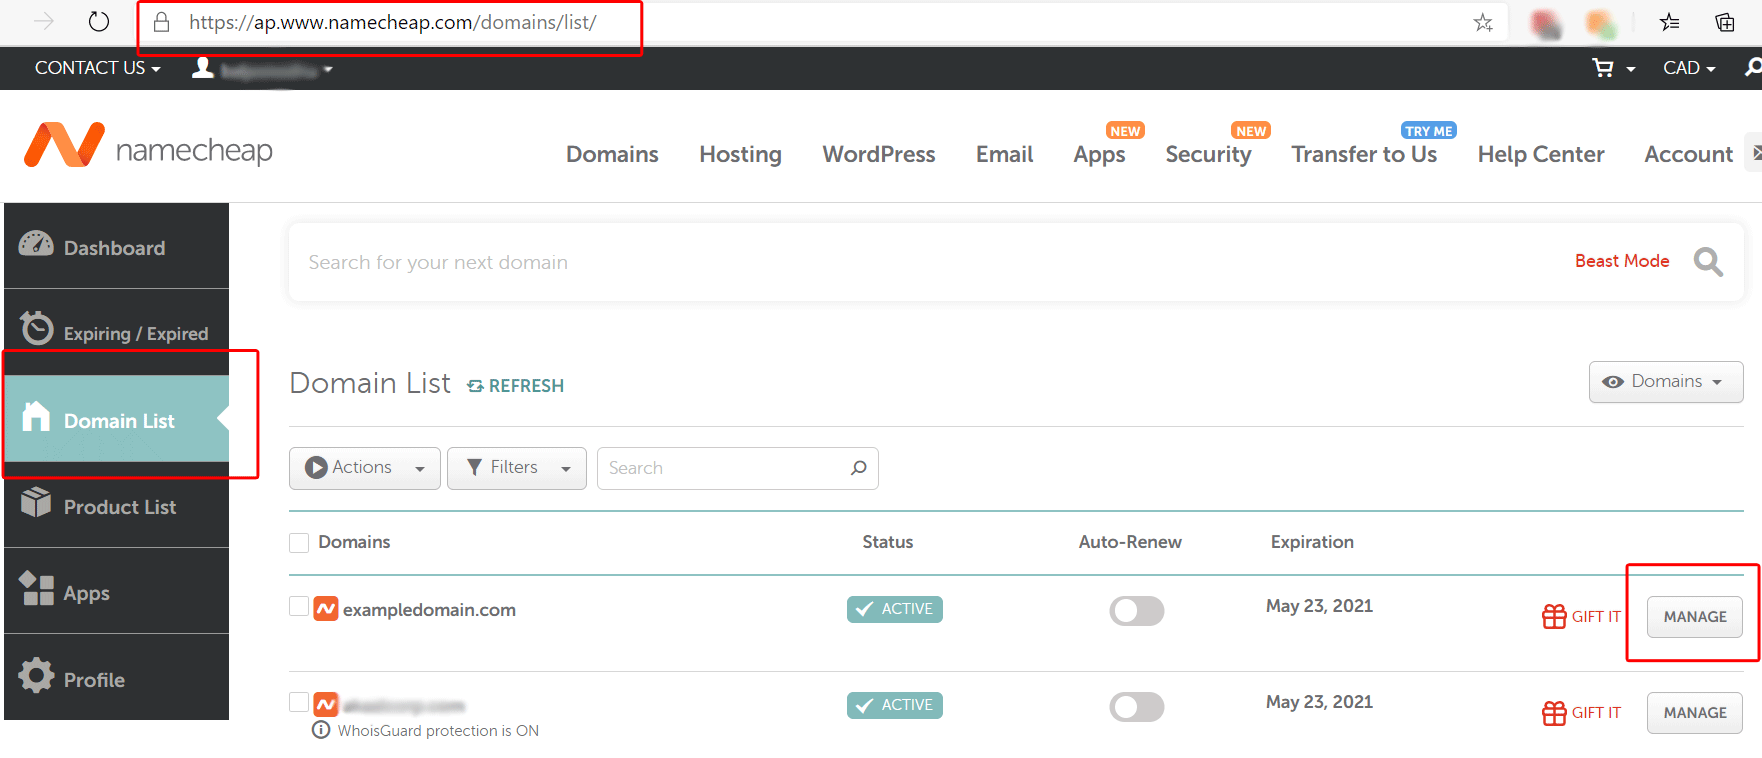
Navigate to "Domains" list and click on "Manage" button next to your primary/desired domain (see step 1 screenshot below).
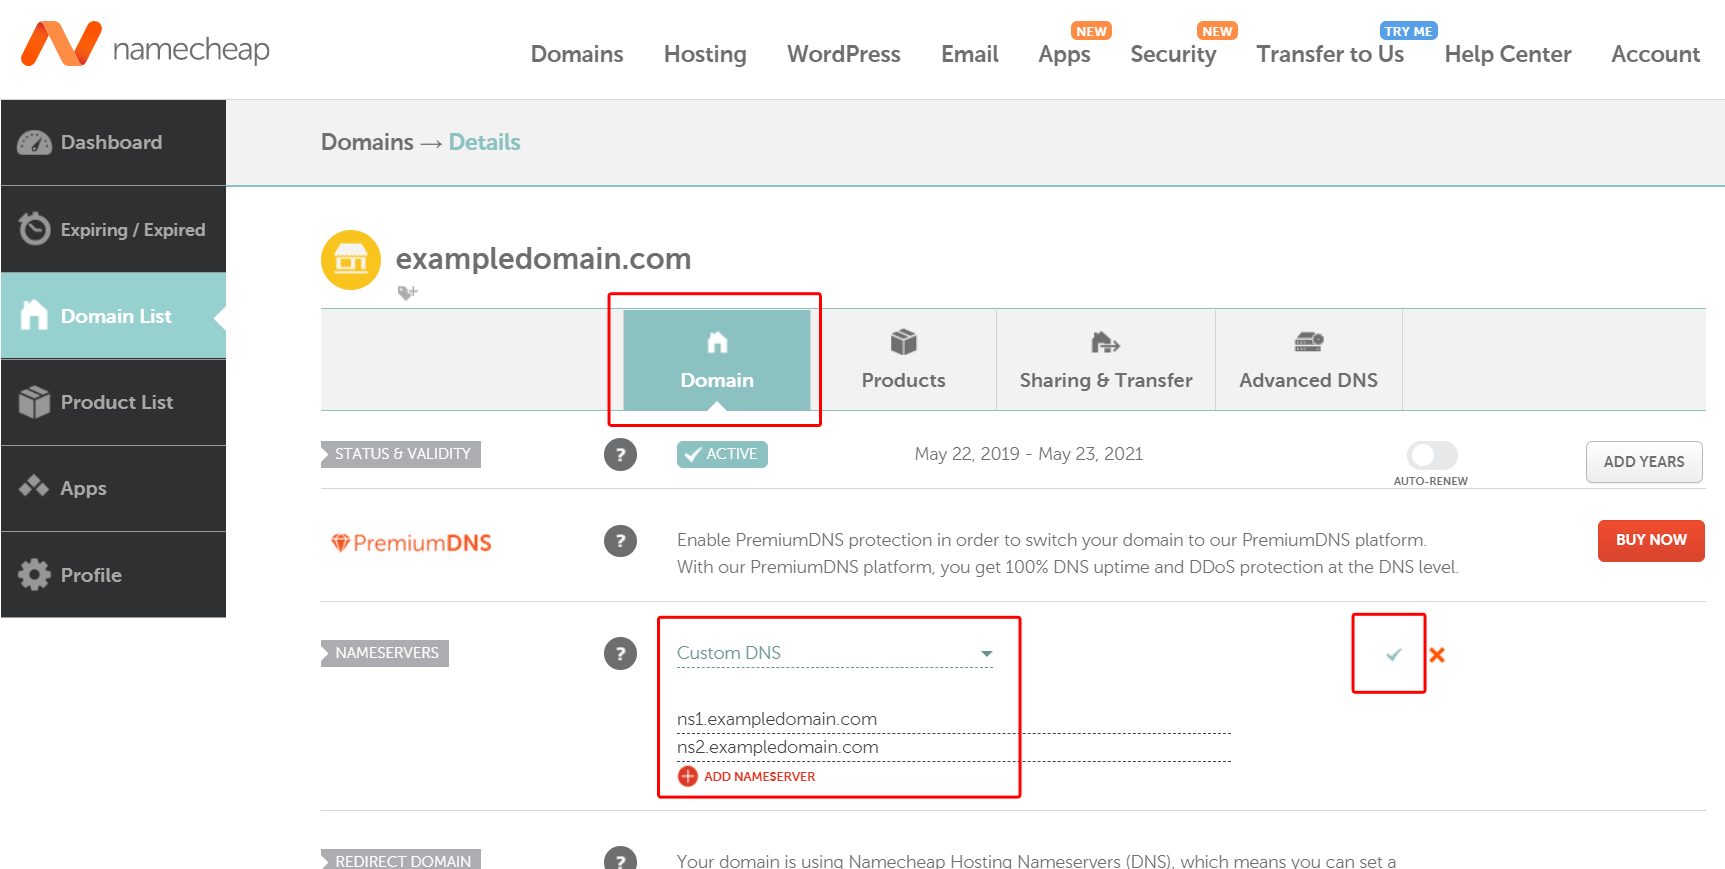
On domain detail, choose "Custom DNS" option then copy-paste your nameserver values from ZesleCP to here (see step 2 screenshot below).
Save the changes by clicking on green tick icon ().
Navigate to "Advanced DNS" tab. Click on " ADD NAMESERVER" to add your custom hostnames (see step 3 screenshot below).
Choose "ns1" from the dropdown, enter your Server's IP, and click "Done". Repeat the same for adding "ns2".
These changes may take up to 24-48 hours to propagate over the internet. You can check & verify your
hostnames here .